
Set up a Local SonarQube Instance for OSS - Chapter 3

Welcome to the third installment in our series of blog posts on SonarQube !
In the first chapter , we guided you through the basic configuration of a local SonarQube instance, while in the second chapter , we demonstrated how to set up SonarQube and your application to display unit and end-to-end test data.
In this third chapter, we’ll explore the integration of SonarLint with WebStorm IDE to help you catch issues early on in the development process.
SonarLint is a powerful plugin that works with various IDEs, enabling you to see code issues, test coverage, and test case counts right within your editor.
In this post, we’ll focus on setting up the SonarLint plugin for WebStorm and connecting it to your SonarQube server. Let’s dive in!
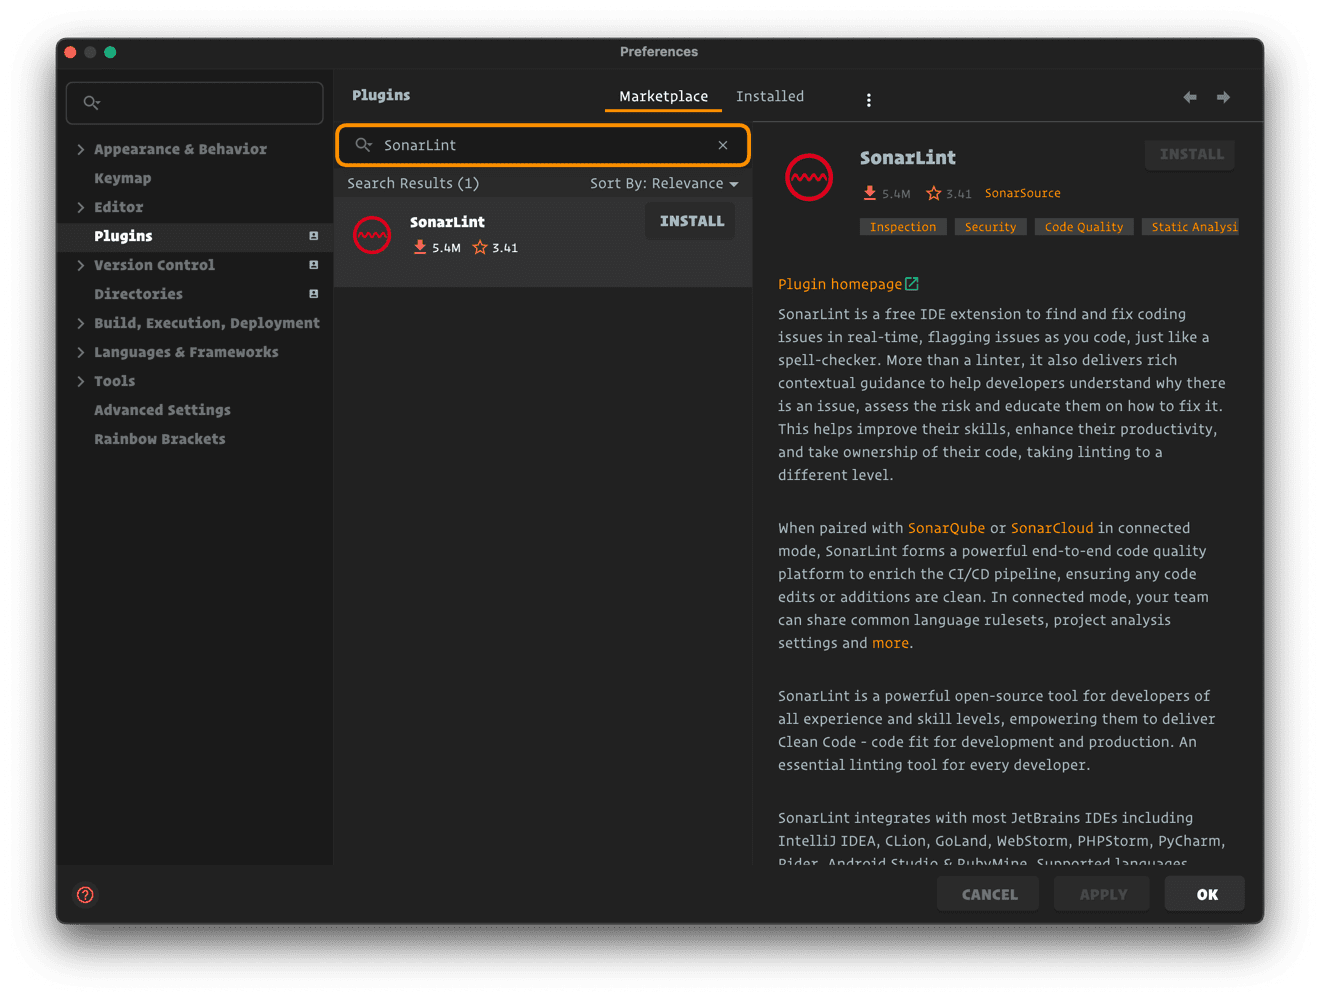
| To install the SonarLint plugin, go to _Preferences | Plugins | Marketplace_ and search for SonarLint. Install the plugin and restart the IDE: |
After the restart, you will see that the SonarLint will prompt you to configure the connection to the SonarQube server. Click on Configure binding:

After clicking on the Configure binding button, you will see the following screen:
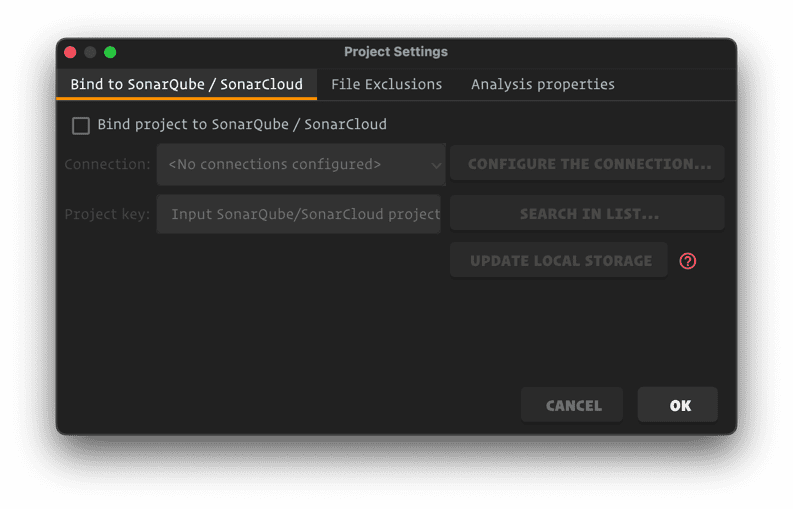
Check the Bind project to SonarQube / SonarCloud checkbox and click on the Configure the connection button. You will see the following screen:
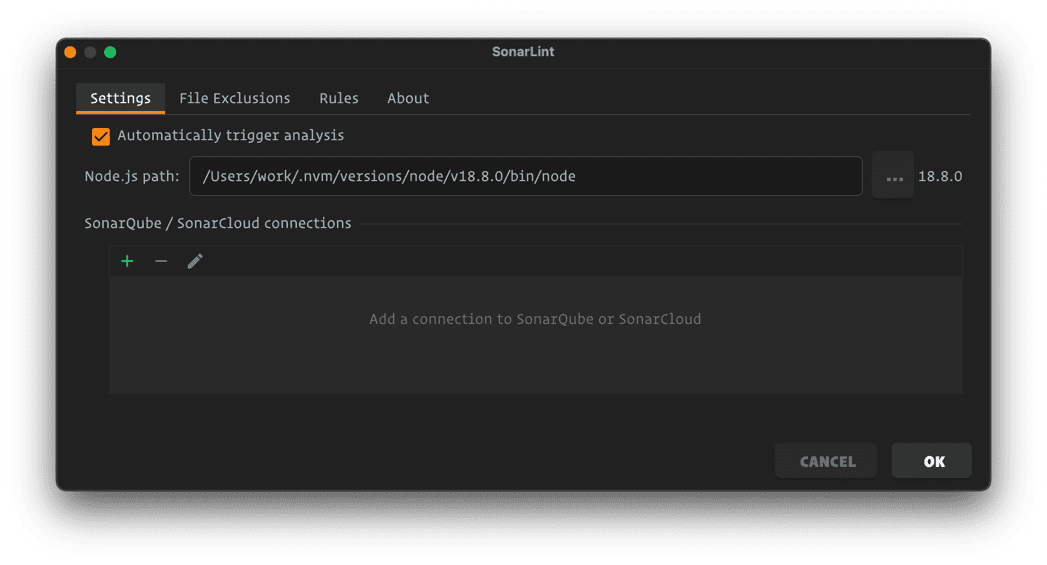
In this screen, you can specify the path to the desired Node version if you have several, you can also create multiple connections for different projects. To proceed, click the Add (plus icon) button. You will see the following screen:
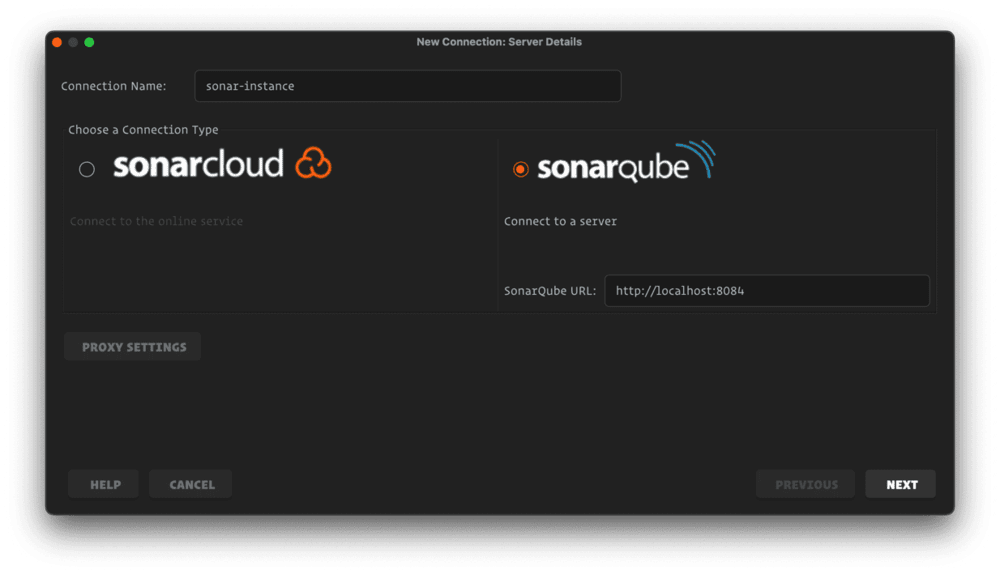
As you can see in this screenshot - there are two Connection Type options to choose from: SonarCloud and SonarQube. We will use the SonarQube option.
To proceed, fill out the Connection Name field, select the SonarQube option, fill out the SonarQube URL field, and click the Next button. SonarQube URL is the URL of your SonarQube server. You can learn how to set it up in the first chapter .
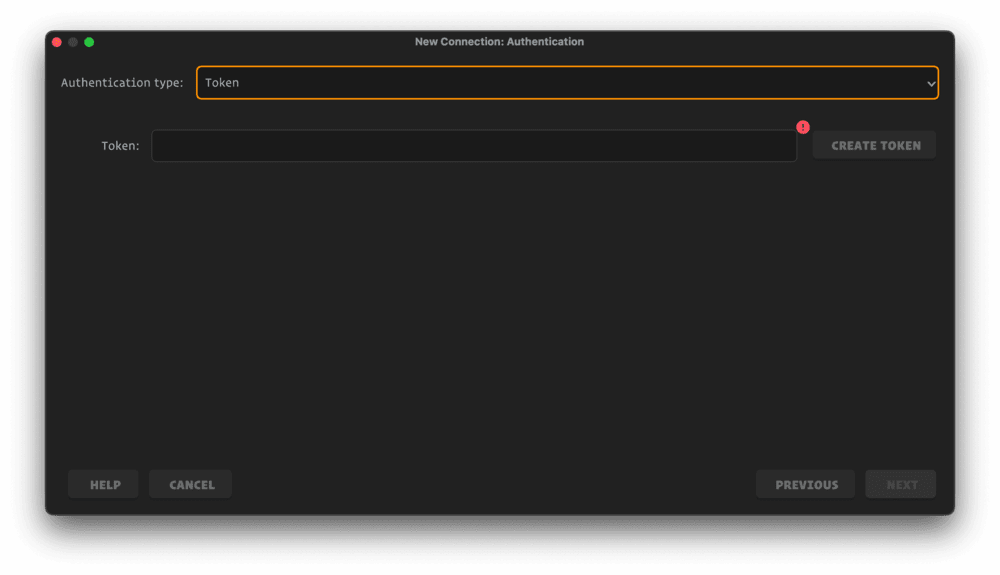
In this screen, you can set up the authentication method. We’ll be using the Token option:
-
If you already have a token, enter it in the Token field and click the Next button to proceed.
-
If you need to create a new token, click the Create Token button.
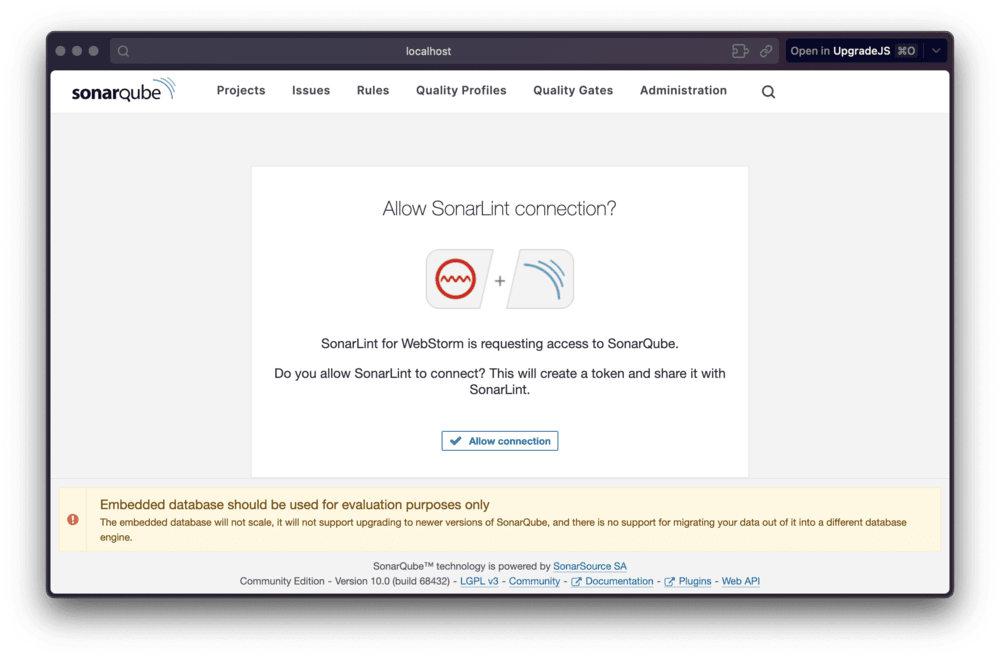
- A browser window will open, taking you to the authentication page.
- Click the Allow Connection button to confirm the authentication.
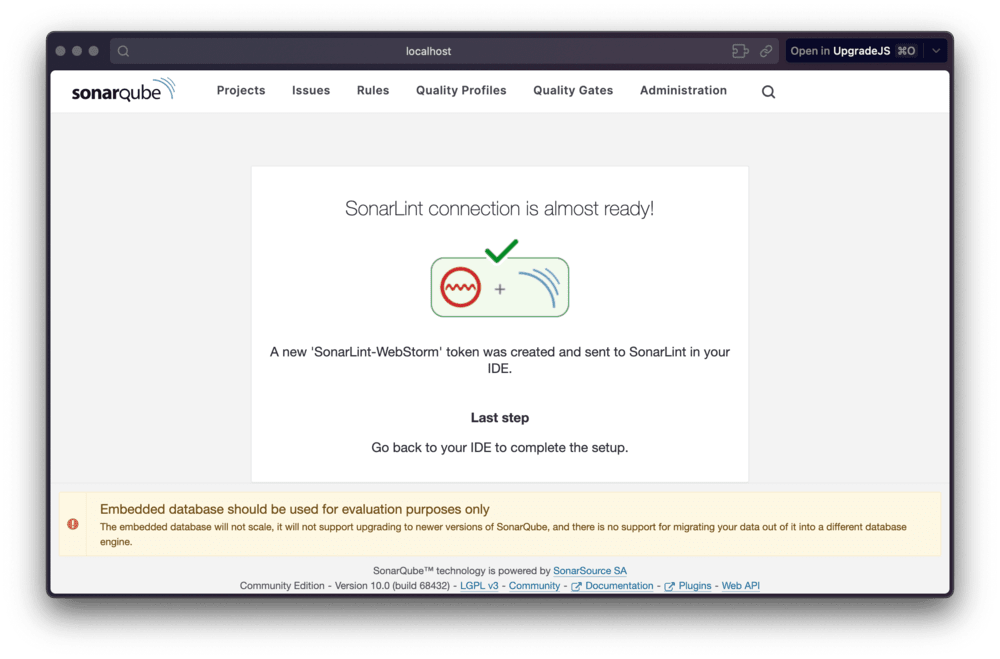
- You will then see a token creation confirmation page. Close this window.
- The newly generated token will be prefilled in the Token field, and you will be automatically redirected to the next screen.
Authentication page:
Token creation confirmation page:
The next screen you will see in your IDE is the Configure Notifications screen:
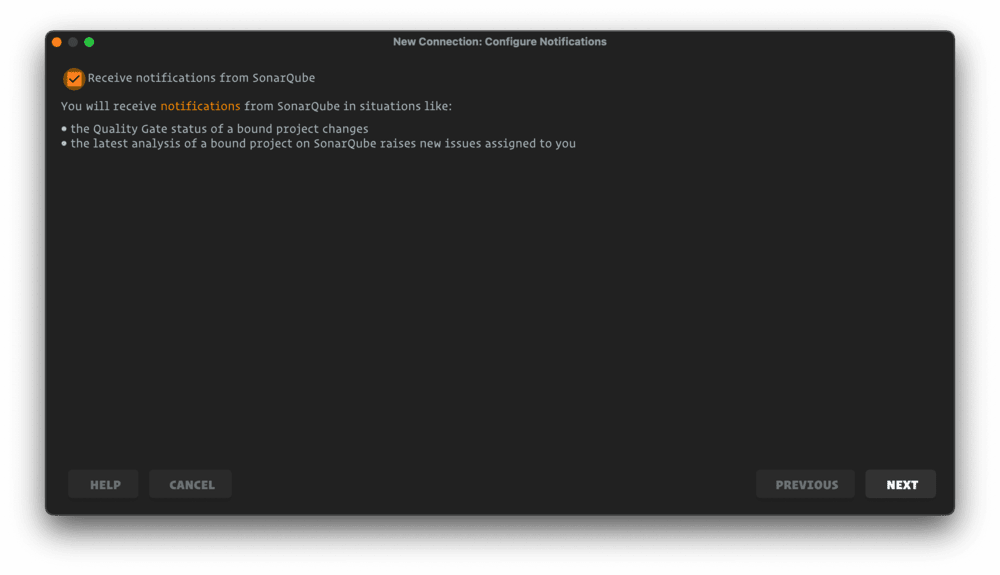
In this screen you can choose to not receive notifications. We will use the default settings, so we will click the Next button.
The next screen is a confirmation of a successful connection creation:
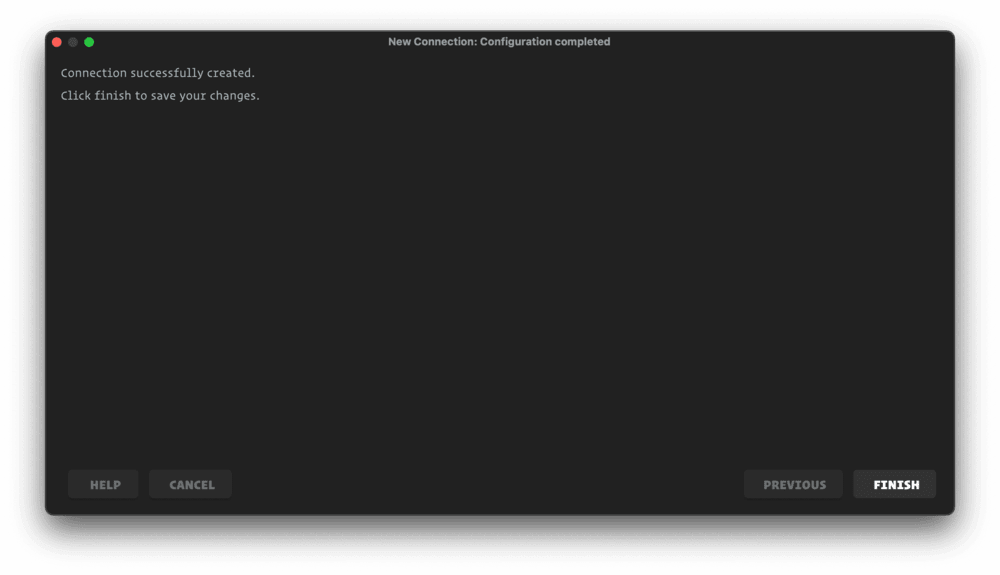
Click the Finish button.
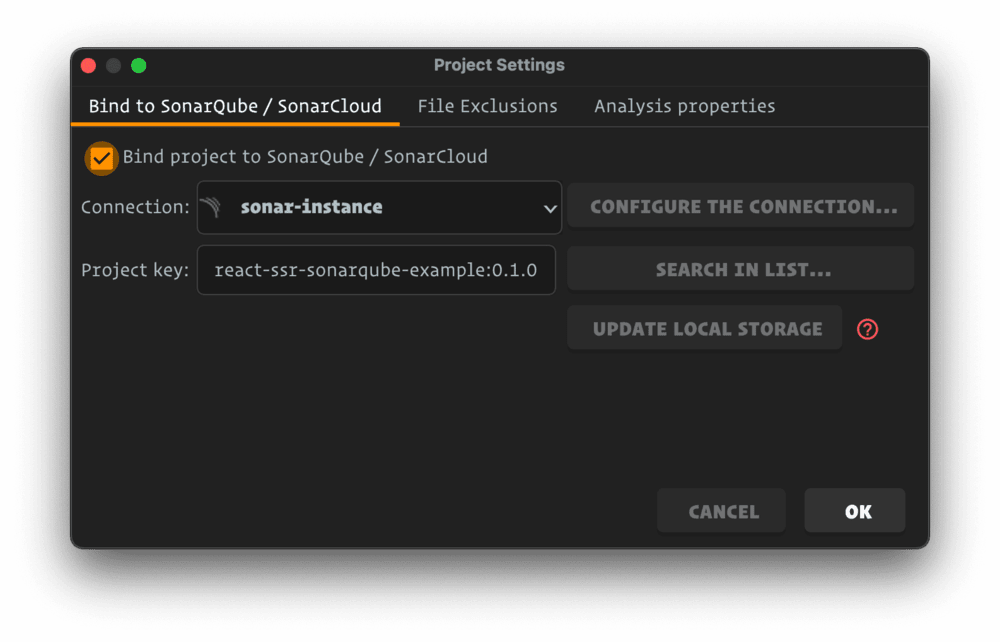
To proceed with the configuration you need to open the Bind to SonarQube / SonarCloud screen again.
This time you will see the recently created connection in the connections list. Select it. You also need to fill out the required field Project Key. The project key is the key of the project in SonarQube.
This key needs to be unique, and we explained how to set it up in the first chapter .
After finishing with the configuration, click the OK button.
A “Processing” modal will appear, and you need to wait until it finishes. After that, you can open any file in your project and see the SonarQube output in the editor:
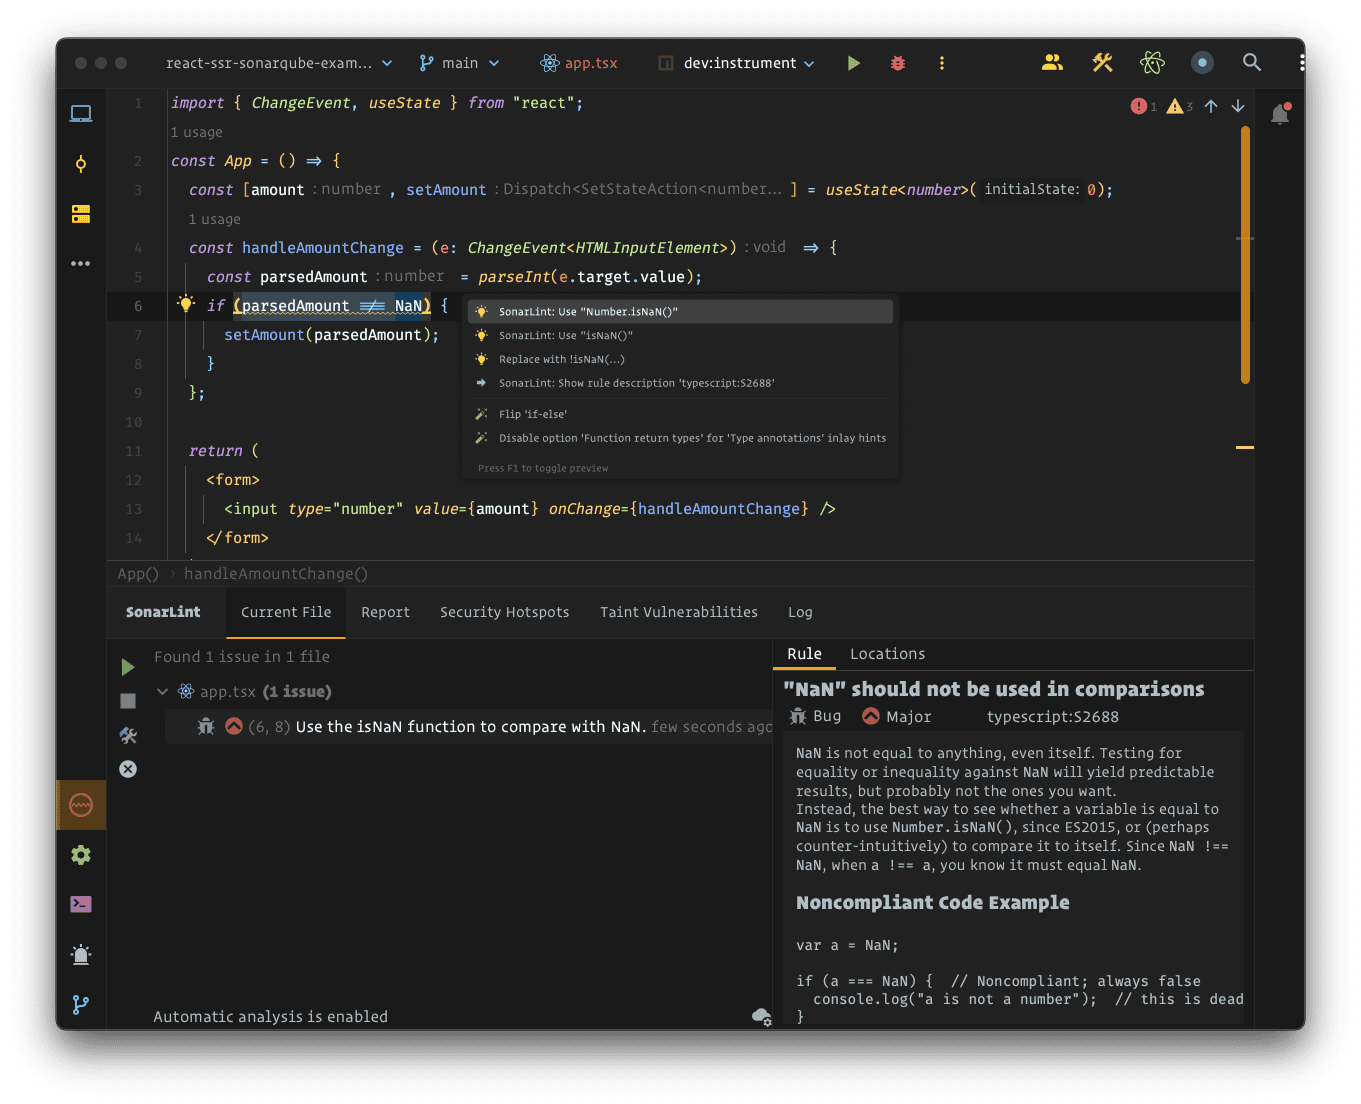
In this screenshot you can see that the SonarLint plugin found an issue in the App.tsx file. You can see the issue description in the editor with suggested fixes, and you can also see the issue description in the SonarLint tool window.
The list of available languages and frameworks can be found in the SonarQube documentation .
Conclusion
In this third blog post of our series on SonarQube, we have successfully walked you through the process of installing and configuring the SonarLint plugin for WebStorm IDE.
With SonarLint, you can now easily spot and address issues in your code, directly from your editor. This not only improves code quality but also saves time by catching problems early in the development process.
Furthermore, SonarLint’s seamless integration with WebStorm allows you to view and address code issues without having to switch windows, which reduces the burden of context switching.
This in turn greatly enhances your overall productivity, as you can maintain your focus on coding while still benefiting from the valuable insights that SonarLint provides.
If you want help enhancing your application you can also Contact Us !.